Tutorial
This tutorial will guide you through the process of setting up and using the Flutter App Intents plugin.
1. iOS Project Setup
First, you need to configure your iOS project to support App Intents.
- Open your iOS project in Xcode (
ios/Runner.xcworkspace). - Select the "Runner" target and go to the "Signing & Capabilities" tab.
- Click "+ Capability" and add "App Intents".
2. Define an App Intent
Create a new Swift file in your Xcode project (e.g., MyAppIntents.swift) and define your intent.
import AppIntents

struct SayHelloIntent: AppIntent {
    static var title: LocalizedStringResource = "Say Hello"

    @Parameter(title: "Name")
    var name: String

    func perform() async throws -> some IntentResult {
        // Your intent logic here
        return .result(dialog: "Hello, \(name)!")
    }
}
3. Register the Intent in Dart
In your Dart code, create an AppIntent object that matches the Swift definition.
import 'package:flutter_app_intents/flutter_app_intents.dart';

final sayHelloIntent = AppIntent(
  identifier: 'SayHelloIntent',
  title: 'Say Hello',
  parameters: [
    AppIntentParameter(
      name: 'name',
      title: 'Name',
      type: AppIntentParameterType.string,
    ),
  ],
);
Then, register the intent when your app starts.
void main() async {
  WidgetsFlutterBinding.ensureInitialized();
  await FlutterAppIntents.registerIntent(sayHelloIntent);
  runApp(MyApp());
}
4. Handle the Intent
Set up a handler to execute code when your intent is invoked.
FlutterAppIntents.setIntentHandler((identifier, parameters) async {
  if (identifier == 'SayHelloIntent') {
    final name = parameters['name'] as String;
    // Show a dialog, navigate, or perform any other action
    print('Hello, $name!');
    return AppIntentResult.successful();
  }
  return AppIntentResult.failed(error: 'Unknown intent');
});
That's it! You can now run your app and test your new Siri integration.
Testing Your App Intent
Step 1: Check Shortcuts App
Look for your app's shortcuts under "App Shortcuts" in the iOS Shortcuts app.
Step 2: Enable Siri (CRITICAL STEP)
⚠️ MOST IMPORTANT STEP - Siri integration is disabled by default:
Visual Step-by-Step Guide:
1. Open iOS Shortcuts app and tap "Counter Example >":
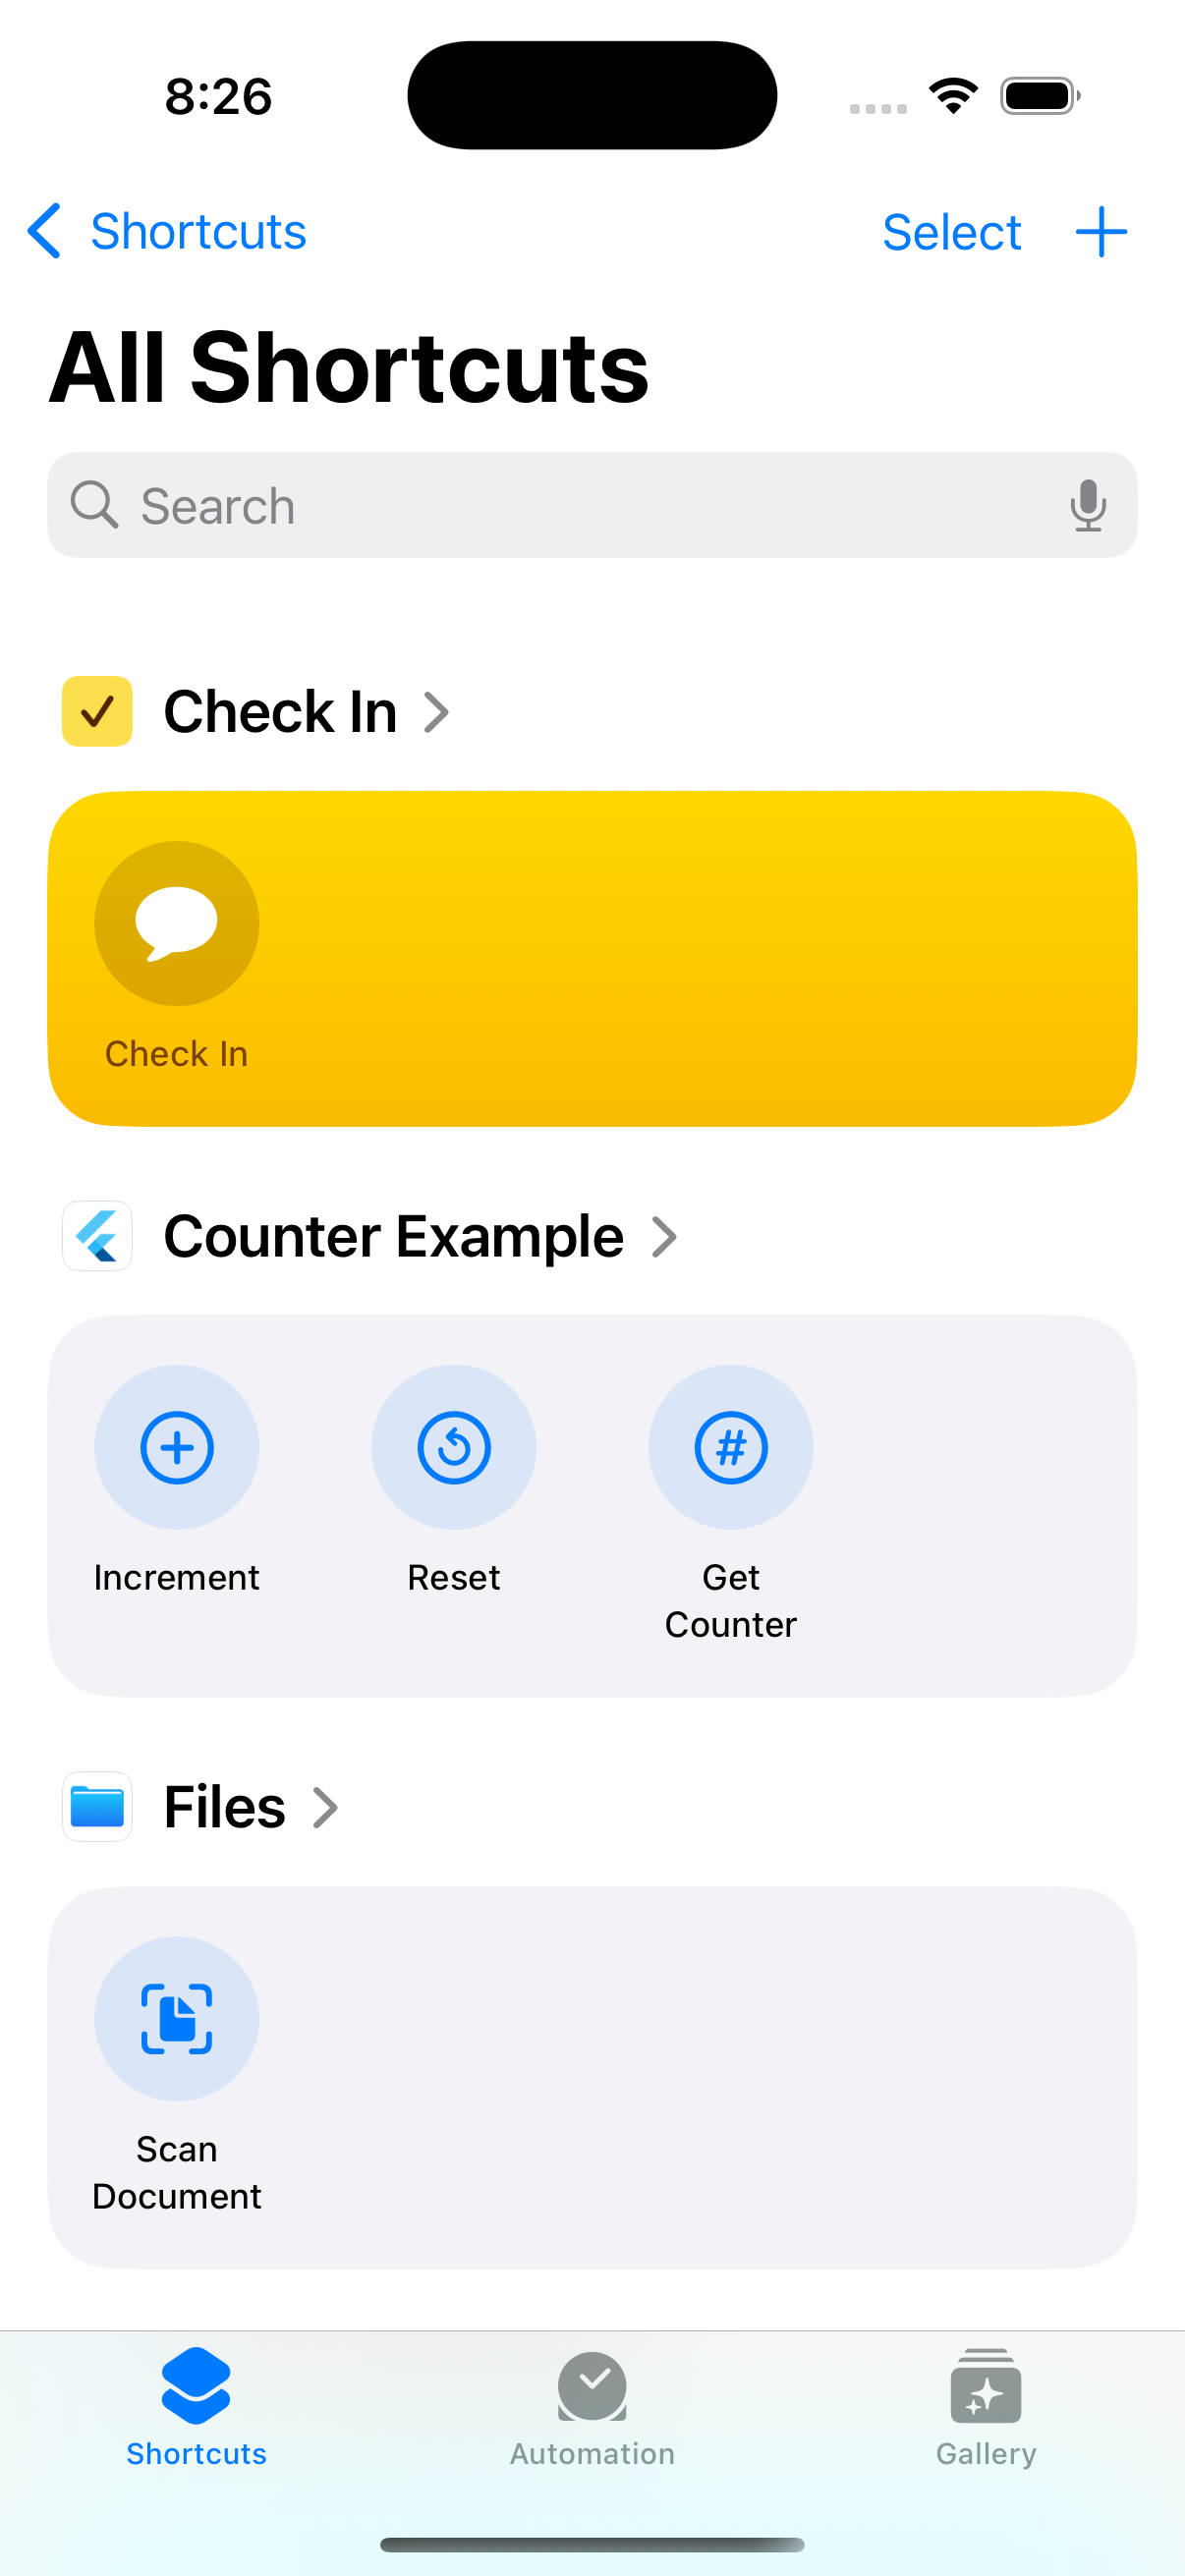
In the iOS Shortcuts app, find your app under "All Shortcuts" and tap "Counter Example >" to access your app's shortcuts.
2. Tap the info icon:
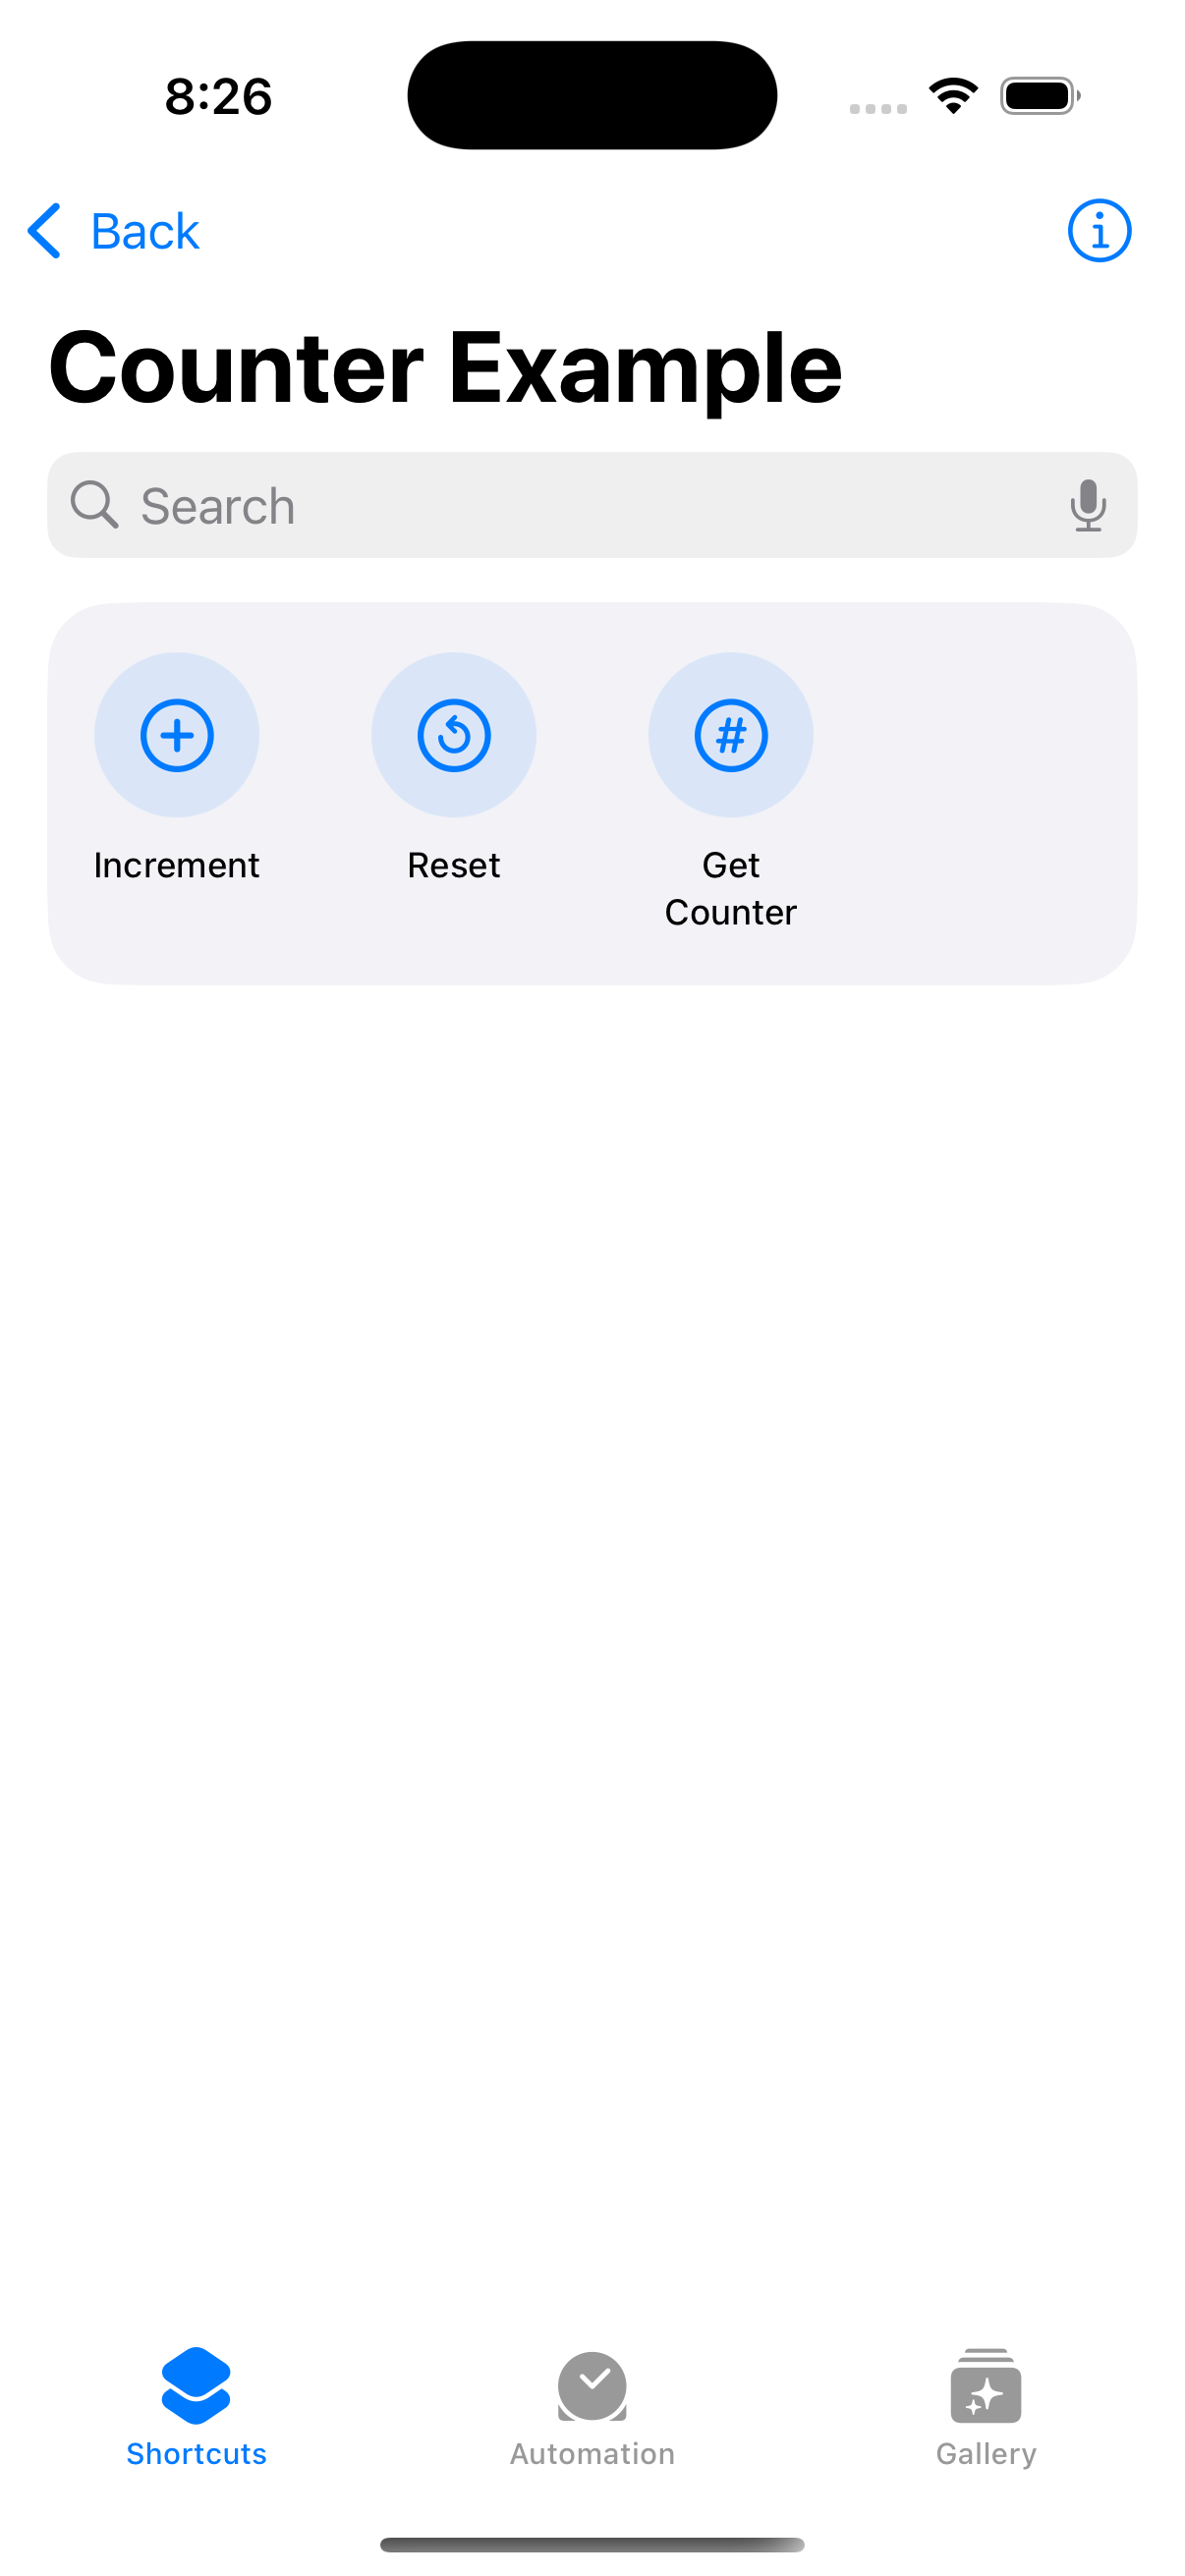
You'll see the individual shortcuts for your app (Increment, Reset, Get Counter). Tap the info icon (ⓘ) in the top-right corner.
3. Enable Siri for all shortcuts:
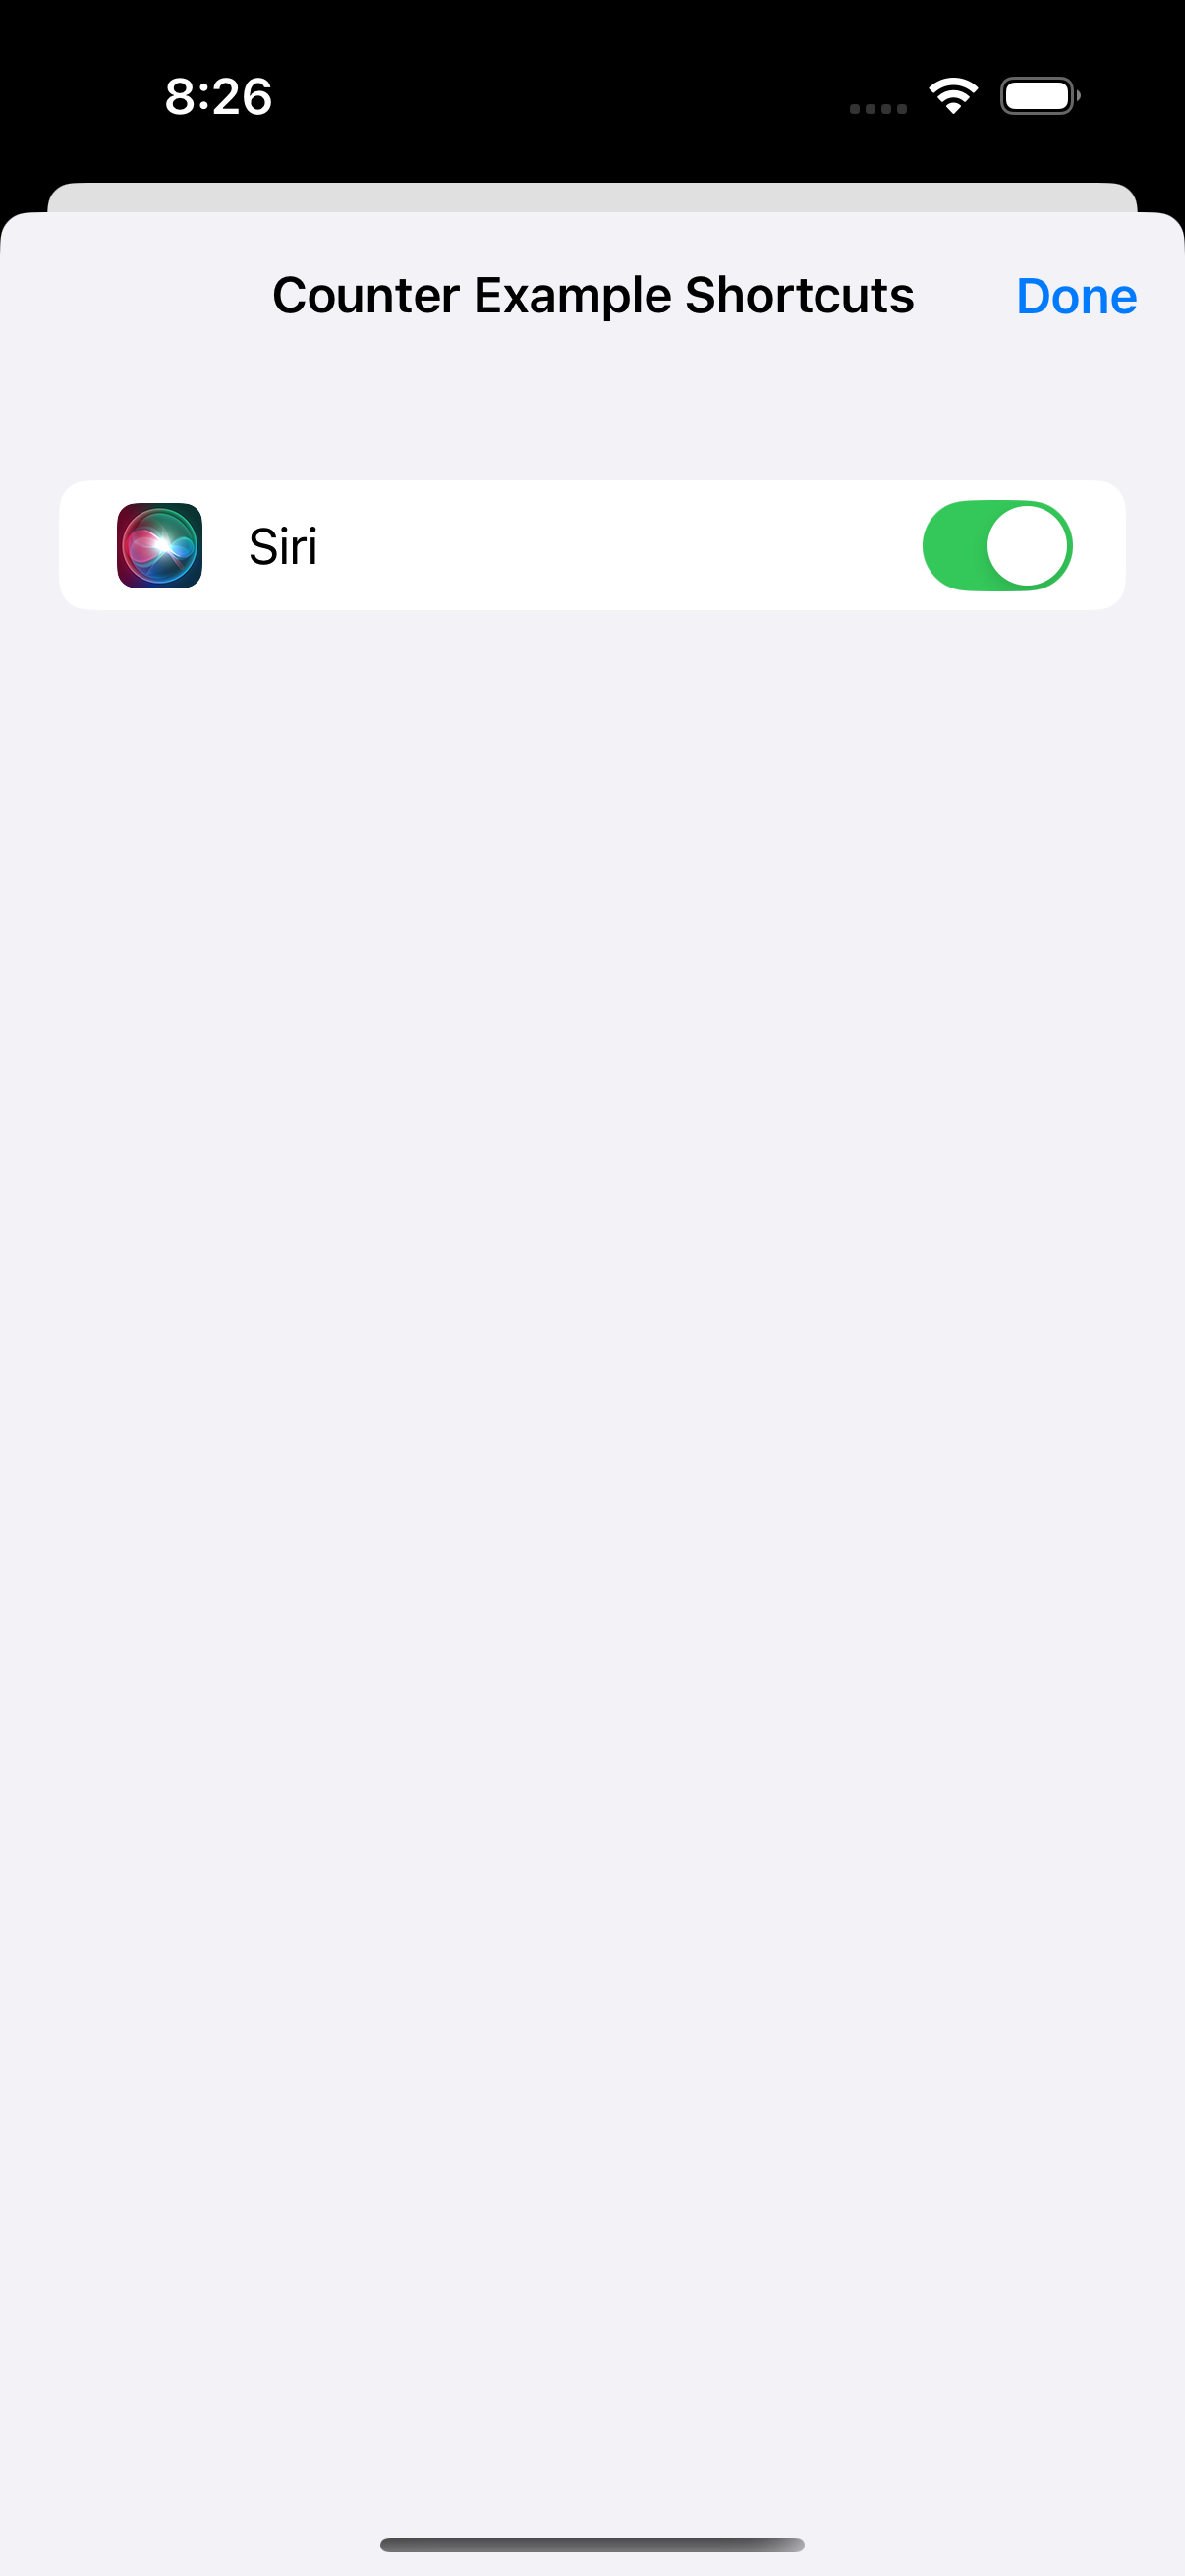
- Toggle ON the Siri switch (it's OFF by default)
- Make sure the toggle is green as shown above
- This enables Siri for all shortcuts in your app at once
Without this step, voice commands will NOT work!
Why this happens: Apple disables Siri for new App Shortcuts by default for privacy reasons. Users must explicitly enable voice access for each app's shortcuts.
Step 3: Test with Siri
Try saying "Say Hello John" to test your intent. If Siri doesn't respond, double-check that you enabled the Siri toggle in Step 2.
Step 4: Troubleshooting
If voice commands still don't work after enabling Siri:
- Restart the Shortcuts app completely
- Try saying the exact phrase shown in the Shortcuts app
- Check the Troubleshooting guide for more solutions